We’re cautious when it comes to recommending upgrades to new versions of macOS. While Apple makes the upgrade process easy (albeit time-consuming), upgrading can create workflow interruptions, render favorite apps inoperable, and have other consequences.
At the same time, it’s essential for businesses using Apple technology to stay in sight of the cutting edge for security reasons and to take advantage of advances from Apple and other developers. Upgrading is not a question of if - it’s a question of when.
We’re not saying that everyone needs to upgrade to macOS 11 Big Sur now, but if you want to, it should be safe now that Apple has released several bug-fix updates (11.2.3 is the latest as of this writing).
However, there are still a few caveats, and preparation is essential.
Reasons NOT to Update to Big Sur
Some people should continue to delay upgrades to Big Sur due to software incompatibilities. Most software under steady development will have been updated for Big Sur by now, but not all.
Some workflows rely on older versions of apps where an upgrade isn’t practical or possible (ancient versions of Adobe Creative Suite, for instance) or on obsolete apps that will never be updated.
You may be able to learn more at RoaringApps, but those who haven’t yet upgraded past 10.14 Mojave may have to upgrade or replace 32-bit apps that ceased working, starting with 10.15 Catalina.
The other app category that continues to have trouble with Big Sur are backup apps that make bootable duplicates. Catalina moved macOS to a read-only volume.
Big Sur goes a step further by applying cryptographic signatures that make it even harder for an attacker to compromise the operating system.
Unfortunately, that also makes creating a bootable duplicate difficult. Carbon Copy Cloner and ChronoSync have developed workarounds. SuperDuper remains incompatible at this point, although an older version can create data-only backups.
If you rely on one of these apps for critical bootable backups, make sure you know what you’re getting into before upgrading, or contact us to reassess your backup strategy.
How to Prepare for the Big Sur Update
We often hear from users who have run these upgrades prematurely, which can cause disruptions to them and their team.
While their intentions may be good (they received notifications from Apple to run the upgrade, they want to always be on the newest software for security purposes, etc), proper preparation and research are required to make sure your choice doesn't negatively affect your workflow and your team.
Anyone determined to upgrade to Big Sur must consider addressing these main tasks:
-
Confirm Company Readiness: Some organizations block macOS upgrades to protect the efficiency of their teams. Upgrading before your team is ready can interrupt more than your workflow. If the upgrade goes wrong, team member’s in your department, and the IT department could be affected. Contact your IT team to confirm company readiness and schedule the upgrade.
-
Update apps: Make sure all your apps are as up-to-date as possible. If you regularly put off updates to your apps — including paid upgrades, now’s the time to run the latest versions of all your apps to ensure Big Sur-compatibility. While doing so, if you discover an app critical to your workflow does not support Big Sur, then stop and wait for a Big Sur compatible update to this app before upgrading.
-
Clear space: Big Sur needs a minimum of 49 GB (before downloading the installer) to upgrade, much more space than previous installers. Don’t cut this close—you should always have at least 10–20% free space for virtual memory, cache files, and breathing room. Contact us if you need help determining what is taking up space and if you can delete or move files to a server location.
-
Make a backup: Never, ever install a significant upgrade to macOS without ensuring you have at least one current backup. In an ideal world, you’d have an updated Time Machine backup, a bootable duplicate, and an offsite (cloud) backup. That way, if something goes wrong as thousands of files are moved around on your drive, you can easily restore.
After those tasks are complete, make sure you don’t need your Mac for a few hours. There’s no telling exactly how long the upgrade will take, especially if it has to convert your drive to APFS, so never start an upgrade if you need the Mac soon.
<<Need help securing your Apple Enterprise environment? Learn what Ntiva can do for you!>>
Initiating The Big Sur Update
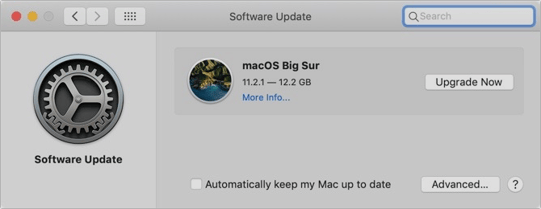
If this is a personally-owned Mac, initiating the upgrade is a matter of opening System Preferences > Software Update, clicking the Upgrade Now button, and following the instructions.

If this is a company-owned Mac, there may be a more efficient way to initiate the upgrade.
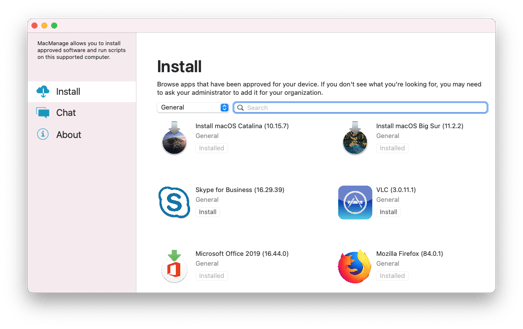
For example, at Ntiva, we recommend using MacManage, our MDM's self-service tool. It has the benefit of running commands as an administrator, even if your daily-use account has Standard permissions.
This empowers users to remain secure in their Standard accounts while also having control over exactly when to begin the upgrade process. This allows our administrative team to control when to unblock Big Sur, and then make a simple installer available to users at their convenience.

After You Upgrade to Big Sur
Part of the reason to set aside plenty of time for your Big Sur upgrade is that there are always clean-up tasks afterward.
If you are a client of Ntiva, we will recommend scheduling time with us soon after your upgrade to help with these tasks.
We can’t precisely predict what you’ll run into, but below are a few situations we’ve noticed. Several are related to security and privacy settings.
At Ntiva, we leverage Apple’s management tools to reduce the need for you to approve company-sanction apps. However, some approvals after an upgrade are unavoidable.
-
macOS will probably need to update its authentication situation by asking for your Apple ID password, your Mac’s password, and if you have another Mac, its password too. Don’t worry that this feels like a potential security breach — it’s expected.
-
Some apps may have to ask for permission to access your contacts and calendar even though you previously granted permission. Again, that’s fine.
-
If you use your Apple Watch to unlock your Mac and apps (and you should, it’s excellent!), you’ll need to re-enable that in System Preferences > Security & Privacy > General.
-
If you use Gmail or Google Calendar, or other Google services, you may need to log in to your Google account again.
-
Websites that usually remember your login state will likely require that you login again. If you’re using a password manager like 1Password, that’s easy.
-
You may have to re-enable text-message forwarding to your Mac on your iPhone in Settings > Messages > Text Message Forwarding.
-
Those who use Backblaze for Internet backups (at Ntiva, we recommend Druva) will find their backups have been “safety frozen.” Follow these instructions for thawing your account.
-
If your administrative password is rejected, a quick PRAM/NVRAM reset may get it working.
-
After installing or updating an app in Big Sur, you may be prompted to approve a system extension. To complete the installation, you must have access to administrative credentials on your workstation to rebuild your system extension cache and restart.
Finally, Time Machine in Big Sur now supports and prefers APFS-formatted drives, and all of Apple’s development is now going in that direction. You can keep using your existing Time Machine backup in Big Sur.
However, after you’re confident everything is working — and you have another backup — it’s worth starting over:
-
Remove your Time Machine backup drive in System Preferences > Time Machine > Select Disk.
-
Reformat the drive as APFS in Disk Utility.
-
Restart the backup in the Time Machine preference pane.
Please note, although there are situations where we will recommend Time Machine backups, we consider Time Machine to be a personal backup solution and recommend Druva for backing up company-owned Macs.
With all that housekeeping done, it’s time to check out all the new features in Big Sur!
Back to blog


.png?width=420&height=420&name=Blog%20Hero%20-%20Square%20(1).png)
-1.png?width=420&height=420&name=Blog%20Hero%20-%20Square%20(1)-1.png)


